Note: YouTube channel must be associated with a seperate Google+ page. You should either already have a Google+ page for your new YouTube channel or a new one will be created in the process automatically.
Create a New Channel
To get started, login to YouTube with your Google account (if not already logged in). Now click on your Google account icon at the top right corner and select “YouTube settings” from it (it’s the gear icon).
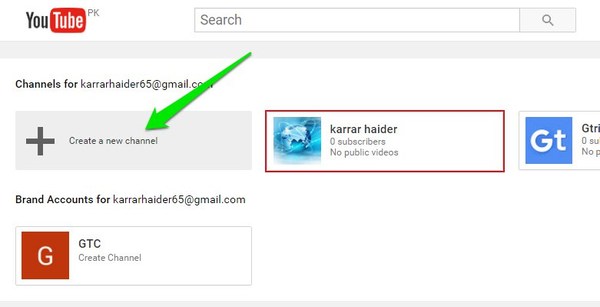
In the “Overview” section of the YouTube settings, click on “See all my channels or create a new channel” link.
On the next page, you will see your current channel with a “Create a new channel” button alongside. Click on “Create a new channel” to start the process.
Give your channel a unique name and specify category where it falls. After that, check the checkbox next to “I agree to the “Pages Terms” and click on “Done”.
That’s it, your YouTube channel will be created along with a Google+ page with the same name. You can now upload videos, add channel art, add description and manage everything else just like you manage your main channel.
Already Have a Google+ Page?
In case you have already created a Google+ page for your new channel, then the process is much simpler. Just go to the same “See all my channels or create a new channel” page from the YouTube settings. Here you will see all Google+ pages under “Brand accounts” that don’t have any YouTube channel associated with them.
Click on the Google+ page for which you would like to create a channel. YouTube will offer you to create a channel, just confirm the prompt and your channel will be created.
Manage Multiple YouTube Channels
Now that you have created multiple YouTube channels, how are you going to switch between them and manage each channel? It’s quite easy actually, go to the “See all my channels or create a new channel” page again and you will see all your channels listed there. Simply click on the one you want to use and you will be redirected to the homepage of YouTube with the preferences of that specific channel. Now all the changes you make or videos you upload will be associated with that specific channel only.
Furthermore, you can also quickly change between channels from the Google account menu. Click on the Google account icon at the top right corner and you will see all your channels below it (there might be a 2-3 seconds delay). You can easily scroll inside the dialog and click on the one you want to switch to.
Tip: To manage the Google+ page that was automatically created with the YouTube account, go to Google+ page manager. Here you will see all the Google+ pages associated with your account, including the new one.
Conclusion
Creating and managing multiple YouTube channels has become very easy now that we can create multiple channels under a single YouTube account. Using the above instructions, you can create up to 50 channels and manage them as we mentioned. You can also use our creative YouTube names generator article for interesting and unique names after you create a YouTube channel. Go on, your audience is waiting. If you have any questions or would like to add any further information, feel free to comment below.