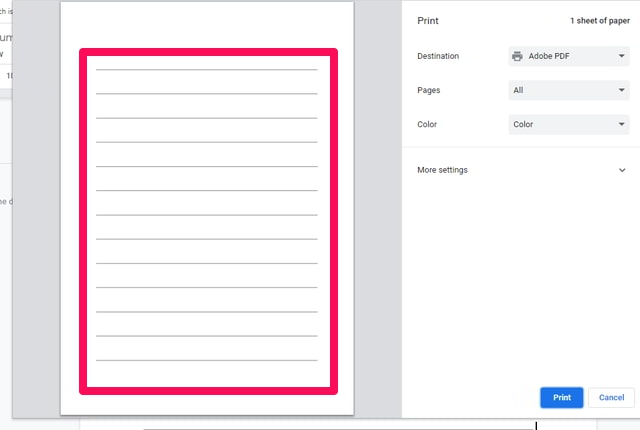
Sometimes It might be needed to print a paper with a notebook like writing lines in “Google Docs”. Such a printed document might be needed for a pen or pencil handwriting by you or your kids. Unfortunately, “Google Docs” does not provide a straightforward or specialized method for this purpose. But it is still possible to have a notebook like writing lines in “Google Docs” with the help of some workarounds. In this article, I will show 3 such workarounds step-by-step. Let’s get started with the first method.
1. Inserting Lines
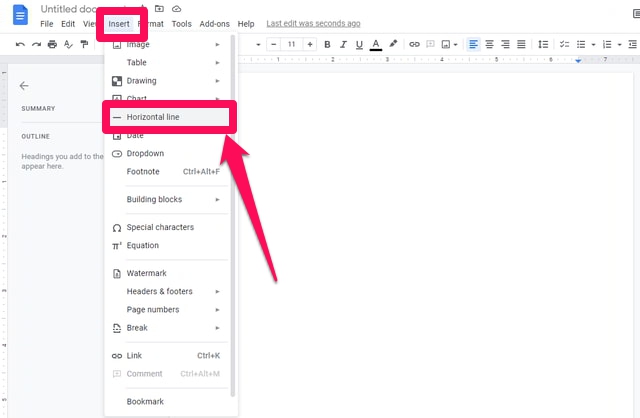
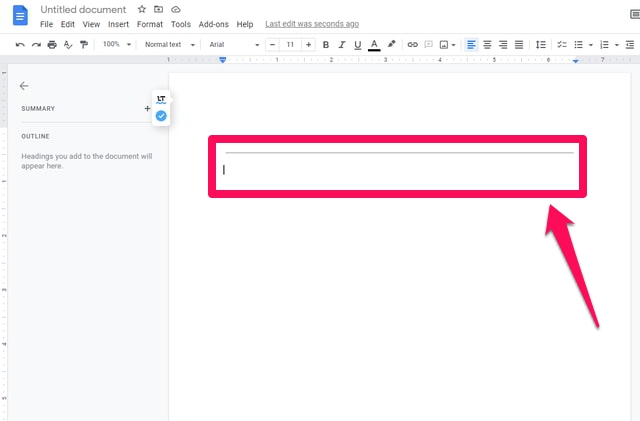
You will have to insert horizontal lines several times from the “Insert” menu in this method. To see this method in action, follow the following steps. Step 1: Launch “Google Docs” and start with a blank document. Step 2: Place your cursor at the beginning of the “Google Docs” document. Click on the “Insert” menu and then on the “Horizontal line” option to insert a line.
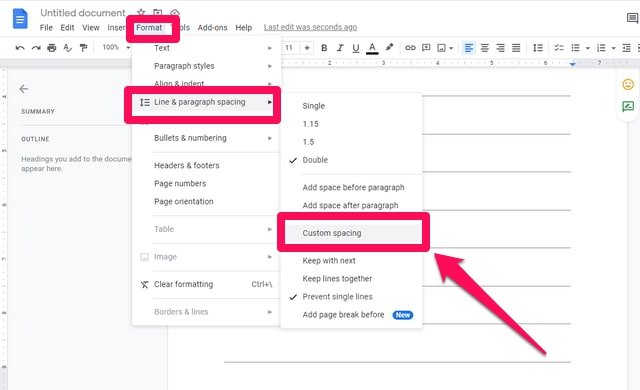
Step 3: Repeat this process a few times from the “Insert” menu or copy-pasting the existing line multiple times. Step 4: If desired, you can increase or decrease the spacing between the lines. To do this, first, select all the lines and click on the “Format” menu, then point your mouse pointer to the “Line and paragraph spacing” option, and then click on the “Custom spacing” option in the expanded menu.
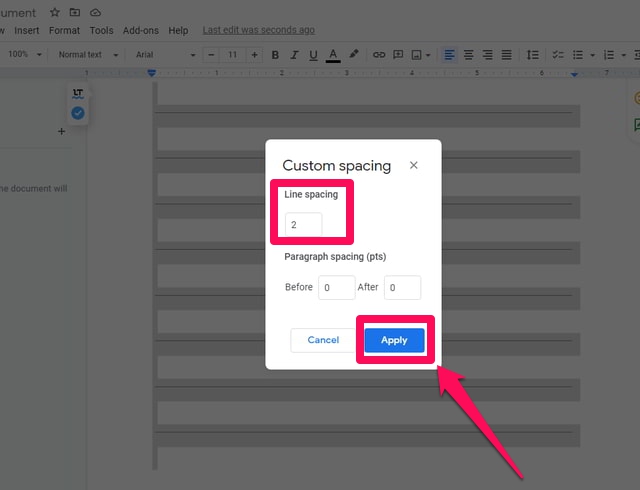
Step 5: In the “Custom spacing” dialog, increase or decrease the value of the “Line spacing” as per your need, and then click the blue “Apply” button.
Step 6: Once you are happy with the spacing, copy and paste the existing lines to fill as many pages as required.
2. Using the Underscore character
Step 1: Launch “Google Docs” and start with a blank document.
3. Using Tables
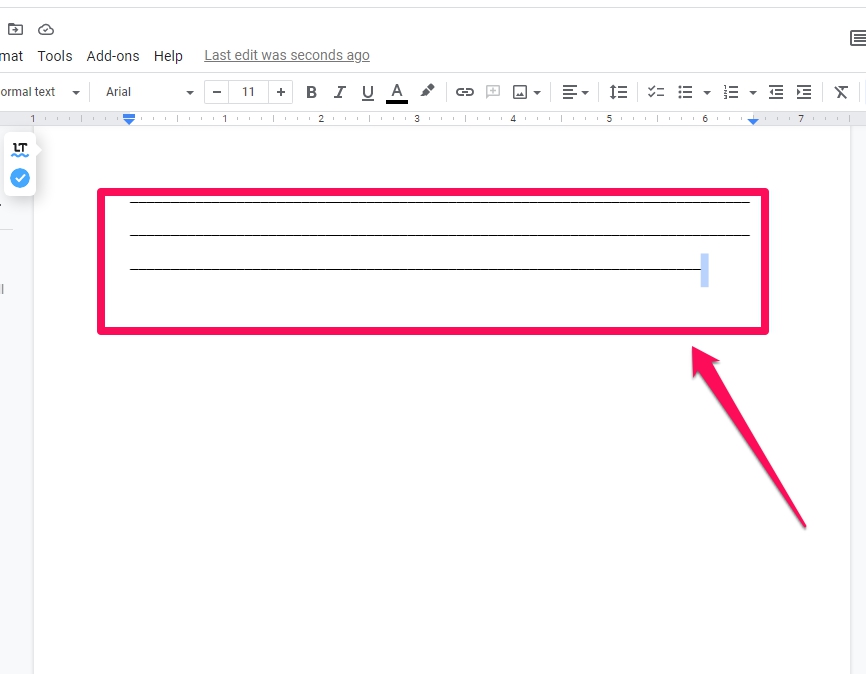
We can work around tables to have the same lined printed document as in the previous section. Proceed as follows. Step 3: Long press the underscore character key (Ctrl + minus sign key on most keyboards) until 4 or 5 lines are drawn in “Google Docs”.
Step 4: Follow steps 4 to step 6 as in the first section to adjust the spacing of the lines and fill pages as required. The end result will be the same. Step 1: Launch “Google Docs” and start with a blank document. Step 3: From the expanded “Table” menu, insert a 1 × 1 table.
Step 4: Click on the small down arrow button at the end of the row of the inserted table, and then click on the “Select all borders” option towards the upper right in the small pop-up window.
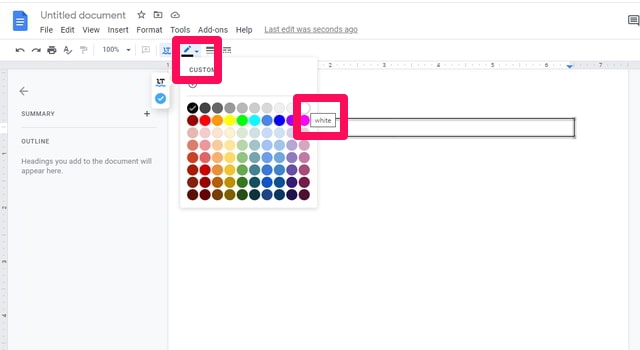
Step 5: Click on the “Border color” option from the toolbar and in the color window click on white color.
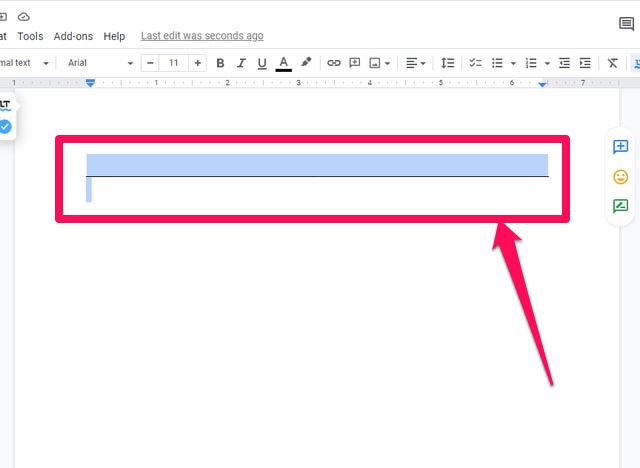
Step 6: Click on the small down arrow button at the end of the row once again, and this time then click on the “Select bottom border” option towards the middle right in the small pop-up window.
Step 7: Similar to step 6 change its color to black.
Step 8: Copy and paste this table multiple times to fill as many pages as required.
Step 9: Spacing between the lines can be adjusted, as in steps 4 and 5 of the previous section. Individual line spacing issues can be adjusted manually by using the “Backspace” key of the keyboard.
Conclusion
Unfortunately, there is no special mechanism in “Google Docs” to print a document with a notebook like writing lines. But simple workarounds can be used. In this article, I have provided 3 such workarounds. The first two are pretty simple, but the last one is a bit lengthy. Let us know in the comments which one of these methods you prefer or about other methods you know about.
