One common issue faced by Google Meet users is that they can’t share audio along with the video. The video you present will be played without any sound by default which puts users in a rather frustrating situation. Luckily there are ways you can bypass this issue and play the video with sound in Google Meet. And I am going to tell you about not one but two ways to share video with audio in Google Meet, read on to find out.
Method #1: Present a Google Chrome Tab
This is the official solution to share audio with the video made available by Google itself. You can use the Present a Chrome Tab option to present an online video and audio to other participants of a Google Meet. While the official announcement from the Google team stated that only G Suite users can access this feature, it appears to be working fine for regular Google accounts. The basic benefit of this feature is that you can present a single Chrome tab that you have selected to the attendees of a meeting. However, you can switch between tabs to select a different tab at any moment. You can follow these simple steps to present a video and audio combination to your Google Meet attendees: Step 1. Join a Google Meet or start a new Meet. Step 2. Click on the Present Now button that usually sits at the bottom of the screen. Step 3. Click on Choose A Tab option from the next menu and you will be taken to a list of current Chrome Tabs.
Step 4. Choose the tab containing the video you want to present and then click on the Share button at the bottom of the window.
Chrome will inform you that you are currently sharing a tab with Google Meet attendees.
Switching shared tabs
You can switch the tab you are currently sharing during Google Meet through these steps: Step 1. Open the tab you want to switch to from the currently shared Chrome tab. Step 2. Locate the prompt at the top of the page that says “Share this tab instead” and click on it.
Confirm that you are now presenting the tab you had selected from the prompt.
Method #2: Adjust your Windows 10 microphone settings
One way to share video and audio at the same time in Google Meet is by tweaking your Windows 10 microphone settings. You can do that with the help of these steps: Step 1. Open the start menu and click on the Setting options. Step 2. Open System settings and then click on the Sound option in the left panel. Step 3. Click on Manage sound devices and find input devices. Step 4. Enable the Stereo Mix option and while you are at it make sure that the microphone option is available along with the Stereo Mix option. Step 5. Now go to Google Meet and click on settings, open the audio option and set the Stereo Mix as your default microphone. Play the video you want to present, and your Google Meet participants should be able to hear the audio from the video you are playing.
Bonus method: Use your mobile device to share audio
There is another option to share audio along with the video by using your mobile phone’s mic to talk while the video is being played through your PC. However, this feature is currently available for Google Workplace hosts only and normal users can’t access it. All you have to do is select the “Use a phone for audio” feature available to Google Workplace hosts and your phone will now serve as a mic so you can speak through it while presenting a video from your PC.
How can I stop presenting in Google Meet?
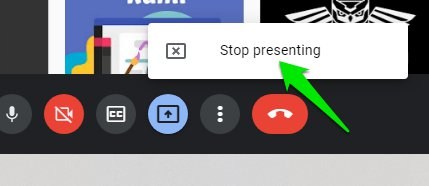
Once you have finished presenting the video or Chrome tab in Google Meet you will eventually have to stop presenting it. Stopping your presentation is easy and all you have to do is this: Step 1. Find the You are presenting button at the bottom of the screen and click on it. Step 2. Click on the stop presenting option to stop your presentation.
Conclusion
While Google Meet is a powerful tool, it still lacks some functionalities, such as the inability to share audio along with your videos. However, using the solutions I have shared with you in this article, you can easily overcome this issue and present clear audio with your videos. My personal favorite is the share a tab method as it doesn’t require making any changes to settings and doesn’t require a special type of account to use.


